Anyone familiar with metalworking knows that brazing is one of the essential techniques to combine two pieces of metal. It is often used when welding and soldering are not viable options due to temperature requirements or structural strength needs. Keep reading if you’re interested in learning how to braze steel, which requires more than just heat and a few tools!
What is Brazing?
Brazing is the process of joining two pieces of metal together by heating them (usually up to around 850-900 degrees Celsius) and then applying a filler material, known as “brazing alloy” or “brazing rod”, which melts at a lower temperature than the base metals being joined. This creates a molecular bond between the two pieces of metal stronger than the individual parts. It also allows for greater flexibility in terms of shape and size.
How To Braze Steel
Now that we know what brazing is, let’s talk about how to do it! Here are some steps you can take to ensure successful brazing on steel materials:
Clean the materials:
Before you begin brazing, make sure both pieces are clean and free from dirt, dust, oil, or other contaminants. Use an abrasive pad or wire brush on all surfaces to be joined and remove any rust or scale buildup. This will help ensure good adhesion between the joint surfaces for optimal results.
Select your filler material:
The type of filler material (or “brazing alloy”) you select should depend on what kind of steel you’re working with – low carbon steel will require different alloy types than high carbon steel – and what temperature range your project needs. Make sure you select an appropriate alloy for your application before starting!
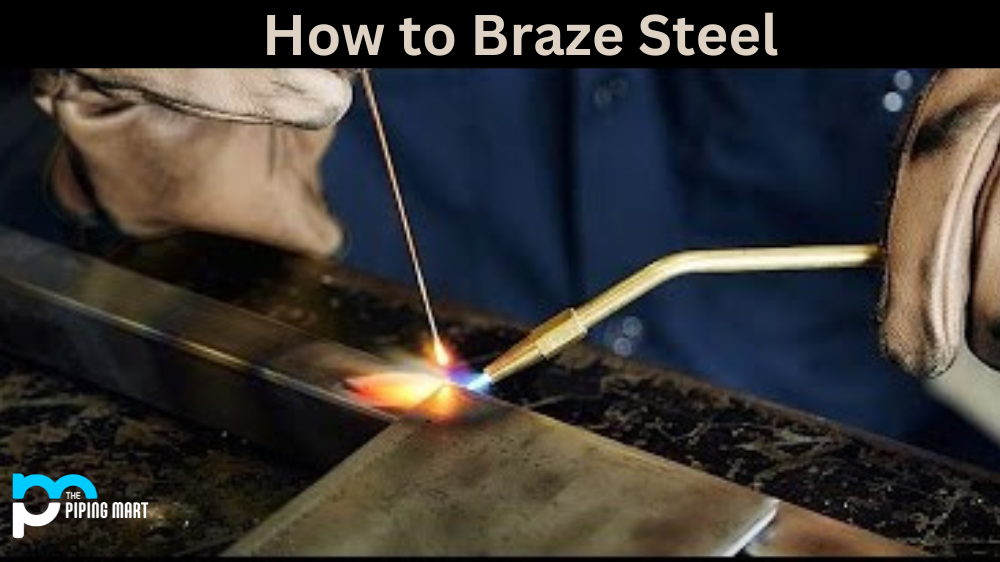
Heat the joint area:
Once everything is prepped and ready to go, heat the area where you plan to place the filler material using a torch or a furnace (depending on your preference). Make sure that both pieces reach an even temperature throughout so they can adequately bond together without any risk of cracking or warping due to unequal expansion/contraction rates due to uneven heating/cooling cycles.
Apply filler material:
Once both pieces have reached their desired temperatures, apply your chosen brazing alloy into the heated joint area until it melts entirely into place – this should happen relatively quickly if everything is prepped correctly! Allow it time to cool down before moving on anything else (or risk damaging it).
Post-processing:
After cooling has occurred, check over your work carefully for any signs of cracking or warping to catch potential issues before they become major ones down the line! Also, sand down any excess brazing alloy residue left after cooling to achieve a smooth surface finish if desired.
Conclusion:
With these steps in mind, anyone can learn how to braze steel in no time! Remember – always make sure you select an appropriate filler material for your application based on what kind of steel you’re working with and what temperature range it needs to withstand; choose quality tools; keep everything clean; practice proper heating techniques; apply brazing alloy accordingly; and check over your work afterwards for any potential problems before continuing onward with projects involving similar materials! With enough practice, anyone can successfully braze steel components together for use in various projects!
Sakshee is a talented blogger, with a particular focus on the Business and Metal Industry. She is passionate about sharing her insights on various metal products and helping professionals to make a better decisions.