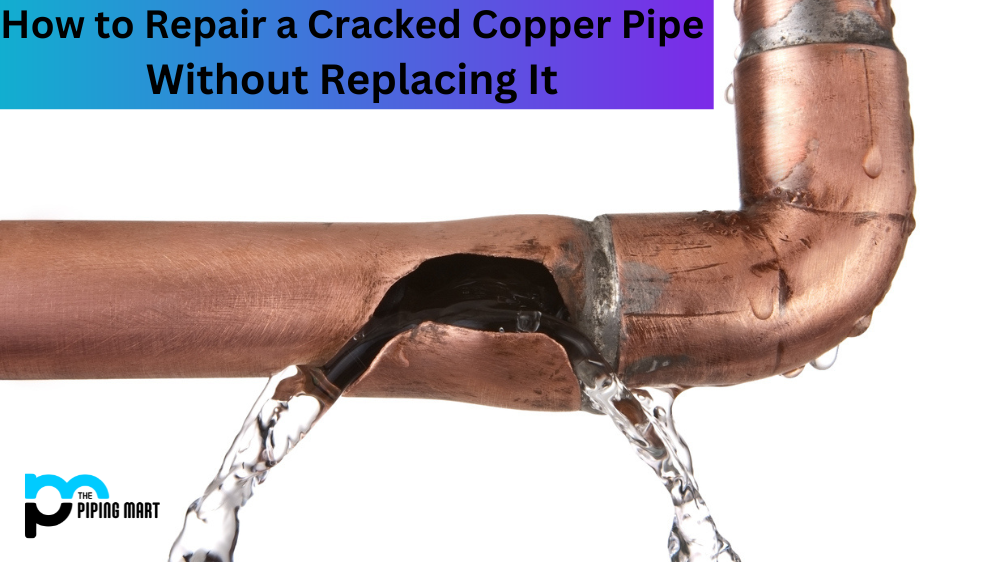
If you have ever had a plumbing problem, you know how expensive it can be to hire a professional. Thankfully, there are some simple DIY fixes that you can do yourself at home to repair a cracked copper pipe without replacing it. This blog post will walk you through the process of repairing the crack and provide tips and tricks for ensuring your repair lasts.
Tools Needed
The tools needed for this project include a hacksaw, propane torch, flux, solder, and sandpaper. The hacksaw is used to cut off any damaged portions of the pipe. The propane torch is used to heat up the pipe so that it can be soldered. Flux helps ensure that the solder adheres to the metal properly. Solder is what seals up any gaps or cracks in the pipe. And finally, sandpaper is used to smooth out any rough patches created by soldering or cutting with the saw blade.
Step-by-Step Instructions
- Cut off any damaged or rusted portions of the pipe using a hacksaw. Make sure that all cuts are clean and even, as this will help ensure your repair job lasts longer. Make sure to wear protective eyewear when using power tools such as a hacksaw!
- Once all of the damaged parts are removed, use sandpaper to smooth out any rough edges left behind from cutting with the saw blade or from corrosion on the metal surface of the pipe itself.
- Heat up the area around where you plan on making your repair with a propane torch until it glows red hot (this usually takes about 10 minutes). This step helps ensure that your solder sticks properly when applied later in this process.
- Apply flux onto both sides of where you plan on making your repair; this will help ensure that your solder adheres correctly when applied later on in this process (the flux also prevents oxidation).
- After applying flux onto both sides of where you plan on making your repair, apply solder onto both surfaces around where you plan on making your repair (make sure not to get too much solder; otherwise, it won’t stick properly). Allow time for everything to cool before touching it again!
- After everything has cooled down, inspect your work and make sure that there are no gaps between pieces or loose solder joints, which could cause future problems down the line- if there are any issues found during inspection, then simply repeat steps 4-5 until satisfied with results!
Conclusion
With a few simple tools and materials, you can easily fix cracked copper pipes without having to replace them entirely! Be sure to follow each step carefully so that your repairs last for years down the road – good luck! Additionally, if repairs seem too daunting for you, then enlisting professional help may be wise – especially if dealing with complex plumbing projects like water heater installation or sewer line repairs! Fixing cracked copper pipes doesn’t have to be difficult – just follow these simple steps and enjoy peace of mind knowing that your plumbing system is safe and sound once again!
A passionate metal industry expert and blogger. With over 5 years of experience in the field, Palak brings a wealth of knowledge and insight to her writing. Whether discussing the latest trends in the metal industry or sharing tips, she is dedicated to helping others succeed in the metal industry.