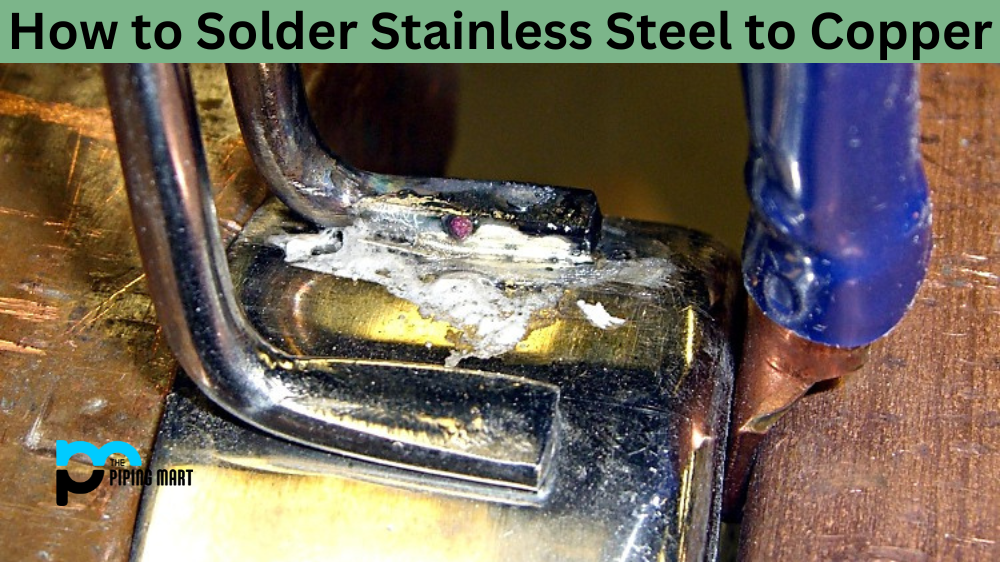
Soldering is a skill that requires patience, precision, and practice. It involves melting metal together in order to create a permanent joint. If you are looking for a guide on how to solder stainless steel to copper, this blog post is for you! We will walk you through each step of the process so you can successfully complete your project.
Step 1: Prepare Your Materials
Before you begin soldering stainless steel to copper, you will need some specialized tools and materials. Gather your supplies by gathering the following items: flux (for cleaning the metals), solder wire (which should be made from silver or tin), soldering iron with a tip small enough for the job at hand, and an appropriate flux brush. Make sure that all of these items are clean before starting.
Step 2: Cleaning The Metals
Next, it’s time to prepare your metals for soldering. Begin by using the flux brush to apply flux onto both surfaces of the metals. This will help ensure that there are no impurities on the surfaces that could affect the quality of your solder joint. Once both sides have been thoroughly coated with flux, use a clean cloth to wipe away excess material before moving on to step three.
Step 3: Applying The Solder
Now it’s time to apply the solder wire onto one side of the metals where they will meet after being joined together. You should make sure that there is enough solder applied so that when heated, it covers both pieces of metal evenly without any gaps or voids in coverage. Once applied, allow it time to cool down before moving on to step four.
Step 4: Heating The Joint
After allowing sufficient cooling time for your applied solder wire, heat up your soldering iron and use it to heat up the area where the two metals meet. Make sure not to overheat, as this can cause damage or weaken its strength once cooled down again. It should take only a few seconds before you can see that all of your metals have melted together properly, forming into one piece when cooled down again after heating up completely with your soldering iron tip applied directly onto it for approximately 10-15 seconds or until results are visible through a melted appearance on all surfaces involved in the joint making process.
Conclusion:
So there you have it – a complete guide on how to solder stainless steel to copper! As long as you follow each step carefully and accurately while paying attention throughout the entire process involved in creating strong joints between two different types of metal components correctly with minimal effort required, then success should be achieved easily every single time! With practice comes perfection, so don’t give up even if results aren’t perfect on the first try, as more experience gained will provide a better understanding necessary for successful completion, ultimately resulting in a professional grade end product created entirely by yourself! Good luck!
A passionate metal industry expert and blogger. With over 5 years of experience in the field, Palak brings a wealth of knowledge and insight to her writing. Whether discussing the latest trends in the metal industry or sharing tips, she is dedicated to helping others succeed in the metal industry.