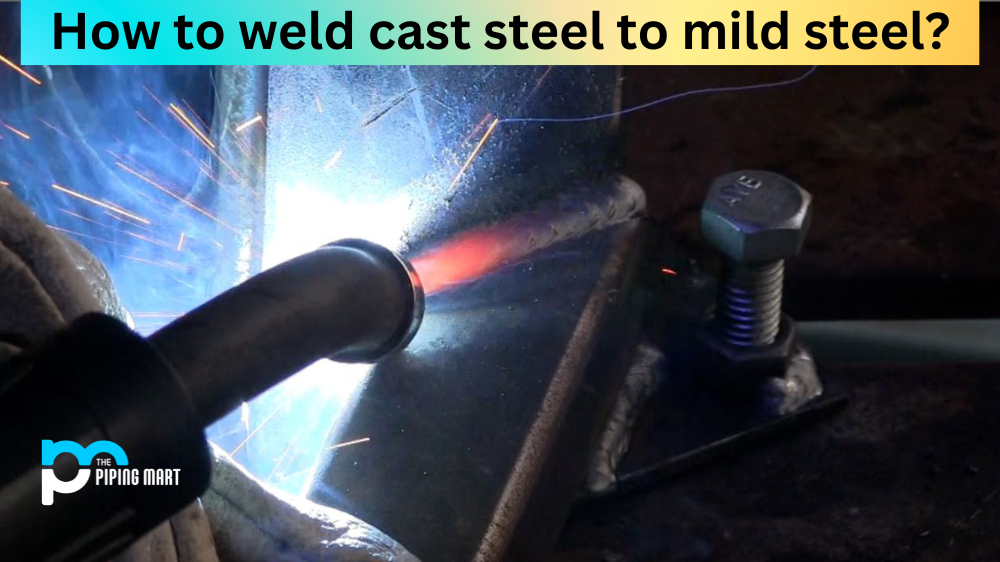
Welding cast steel to mild steel can be a tricky process, but with the right tools, techniques, and materials, it can be done successfully. If you’re looking to learn how to weld cast steel to mild steel, then this blog is for you. We will break down the steps for you and explain what materials and equipment you’ll need.
Step 1: Gather Your Materials and Equipment
Before you begin welding cast steel to mild steel, make sure you have all of the necessary materials. You’ll need a MIG or TIG welder with a strong amperage setting (at least 200 amps), an auto-darkening welding helmet, protective gloves and clothing, carbon dioxide gas for MIG welding, and tungsten for TIG welding. You’ll also need abrasive cleaning pads, flux core wire for MIG welding if CO2 gas isn’t available, and two pieces of metal that are both clean and free of rust or debris.
Step 2: Clean the Metal Pieces
Before beginning any type of welding project, it’s important that your metal pieces are clean so they weld together properly. Use an abrasive cleaning pad on each piece of metal in order to remove any dirt or debris from the surface before starting your project. This will ensure that your pieces of metal bond together better when you weld them together.
Step 3: Set Up Your Welder
Once your metal pieces are clean and ready to go, it’s time to set up your welder. For MIG welding with carbon dioxide gas, make sure that the current level is set to at least 200 amps or higher, depending on the thickness of your metal. If you’re using flux core wire instead, then set the current level between 220-250 amps, depending on the thickness of your material. For TIG welding, use a tungsten electrode with a current level between 120-140 amps, depending on your material’s thickness. Make sure all other settings are properly adjusted according to manufacturer instructions before beginning your project as well.
Step 4: Start Welding!
Now it’s time to start welding! Begin by placing one piece of metal flat on a workbench or table and clamping it into place if needed, so it doesn’t move during the process. Place the second piece of metal over the top so that its edges line up with those of the first piece, then secure them in place with clamps if desired as well. Begin slowly moving your welder along the edge where both pieces meet while maintaining constant pressure until they are completely joined together in one seamless piece as desired. When finished, unclamp everything and inspect your work before proceeding further as needed!
Conclusion:
With these steps in mind, you should now know how to successfully weld cast steel to mild steel without any issues at all! Remember that safety is always key when performing any kind of welding job, so make sure you wear protective gear at all times while operating a welder, as well as double-check all settings beforehand before beginning any project too! Thanks for reading our blog post today – happy forging!
Meet Heer, a dynamic and driven writer learning tricks of her trade in the metal industry. With a background in Digital Marketing, Heer brings a unique perspective to her writing, sharing valuable insights. Apart from blogging she like reading and hiking.