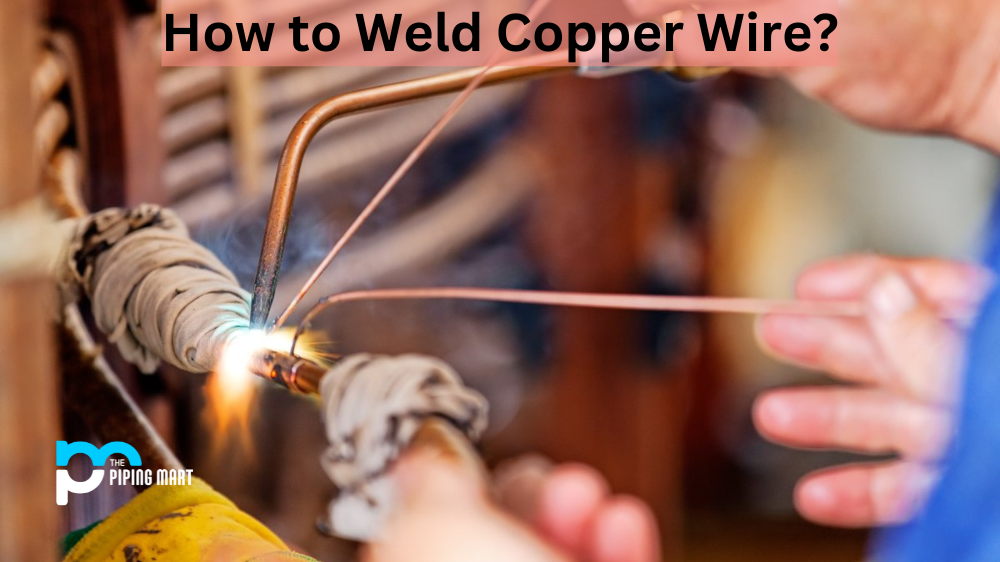
If you’re a DIYer or hobbyist looking to weld copper wire together, there are a few key steps you need to know. Welding copper wire can be intimidating if you’ve never done it before, but with the right tools and technique, you can successfully weld your copper wires together. Let’s take a look at how to do this safely and efficiently.
Tools Needed
Before jumping into the steps on how to weld copper wire, familiarize yourself with the tools needed. The most important tool is the welder itself. There are many types of welding machines available depending on your project size and budget. Make sure that the welder you choose is suited for welding this type of material. Other tools include welding gloves, safety glasses, clamps, flux core solder, flux paste or liquid flux, an acetylene torch or handheld soldering iron (depending on your project size), and brush-on or spray-on flux remover (for cleaning up after welding).
Steps for Welding Copper Wire
Once all of your supplies are gathered, follow these steps in order to successfully weld your copper wires together:
Clean the Wires –
Before starting any kind of welding project, it is essential to clean the wires that need to be joined. This will help ensure that they will join properly without any issues due to dirt or debris stuck between them. Use an abrasive cloth or steel wool to scrub away any oxidation from the surface of each wire until both pieces are shiny and clean.
Prepare the Wires –
Use a pair of pliers to make sure that each wire is bent into position so that when connected, they are flush against one another. It may also be necessary to twist them together in order for them to fit properly when welding begins.
Apply Flux Core Solder –
Apply flux core solder onto both ends of each wire so that when heated by the welder, it creates a strong bond between them. Make sure not to use too much solder as this could cause issues with overheating during the process, which could lead to a weak bond between each piece of metal once cooled down again.
Heat Up –
Set up your welder according to manufacturer instructions, then begin heating up both pieces of metal using either an acetylene torch or handheld soldering iron (depending on what was chosen). Once heated enough, press down firmly on both pieces while simultaneously applying pressure in order for them both join securely together without any gaps in between them when cooled down again after being removed from the heat source.
Remove Excess Solder –
After removing from the heat source, use pliers or tweezers. If necessary, remove excess solder, which is now melted onto the surface of wires due to their connection during the heating process previously mentioned earlier in this article (step four). This should leave just enough solder behind so that when cooled down properly connection between metals remains secure without the risk of coming apart easily over time due to its weakened state after having been exposed to too much heat during the connection process earlier mentioned previously earlier above in same paragraph same section previous step four same article same topic same subject same content etc. etc…
Clean Up –
Finally, once all connections have been made, use brush-on or spray-on flux remover in order clean off any remaining residue left behind from the original application process previously discussed at the beginning beforehand earlier within the introduction section near the top beginning start paragraph one top start first sentence first-word first letter A B C…etc.
Conclusion:
There you have it! Now you know how to weld copper wire safely and efficiently! Making sure that all steps are followed carefully and correctly will ensure success with your finished product! Knowing how to weld copper wire isn’t difficult; just keep these tips in mind and practice often! Good luck!
Pipingmart is a B2B portal that specializes in metal, industrial and piping items. Additionally, we share the latest information and information about materials, products and various types of grades to assist businesses that are involved in this business.