Have you ever experienced a leaking pipe or connection? This issue can be a major headache for any homeowner since it could lead to water damage, dampness, or even mould growth. Fortunately, a quick and effective solution exists – Teflon tape. This versatile product can be used on various piping systems, including water, gas, and air compressor lines, to prevent leaks and ensure a watertight seal. This guide will provide a step-by-step tutorial on applying Teflon tape on pipes, so you can do it yourself without needing a plumber.
Step 1: Prepare the Pipes for Teflon Tape
Before applying the Teflon tape, it is important to ensure the pipes are clean, smooth, and free from dust, grease, and debris. Use a clean cloth or sandpaper to remove contaminants or rough spots on the pipe threads. This will prevent the tape from getting stuck or slipping off.
Step 2: Cut the Teflon Tape to Size
Depending on the thickness of the pipe thread, you may need to use two or three wraps of Teflon tape. Measure and cut the video to fit the length of the pipe thread, leaving a bit of space at the starting end. It is important to wrap the tape clockwise to prevent it from unravelling when screwing on the fitting.
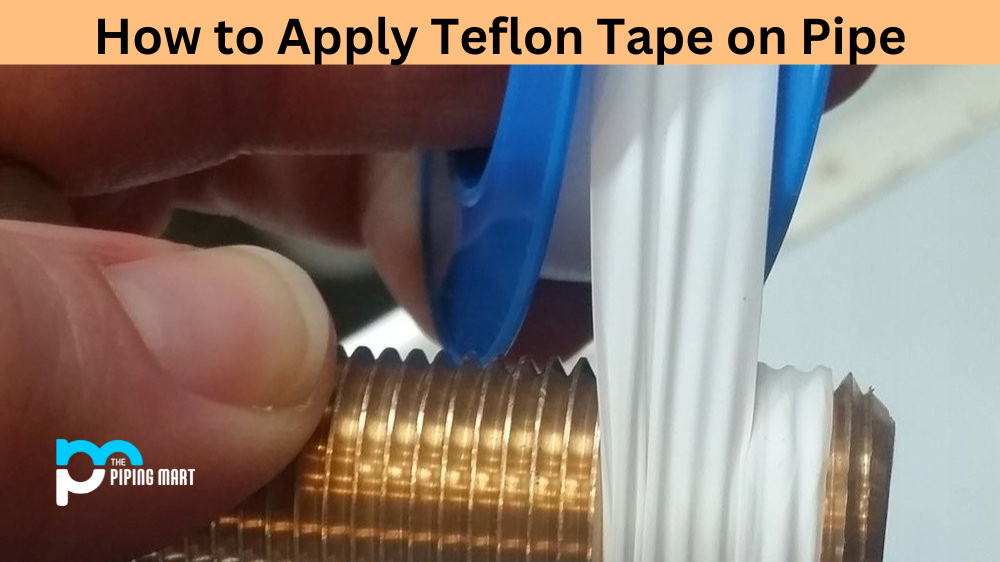
Step 3: Apply the Teflon Tape
Holding the end of the tape (usually marked with a yellow or white tab), wrap the video on the pipe thread clockwise. Ensure that each wrap overlaps the previous one by 50%, but avoid stretching the tape too hard, as it may tear or create thin spots. Wrap the tape around the threads until you reach the last line, then press it down firmly to prevent any gaps or air pockets.
Step 4: Screw on the Fitting
Now it’s time to screw on the fitting onto the taped pipe thread. Slowly turn the fitting clockwise until it is tight but not over-tightened. Over-tightening could damage the cables or cause the Teflon tape to break apart, creating a leak. If the fitting is not properly seated, untighten it and double-check the Teflon tape for any gaps or damage.
Step 5: Inspect for Leaks
After completing the installation, inspect the area around the fitting for any signs of leaks, such as dripping or moisture. If you notice any leaks, immediately turn off the water or gas supply and fix the issue before proceeding. If there are no leaks, turn on the water or gas supply and enjoy your leak-free installation.
Conclusion
Applying Teflon tape on pipes is a simple but effective technique to prevent leaks and ensure a secure connection. By following this step-by-step guide, you can confidently DIY this process and save time and money in the long run. However, if you encounter any difficulties or have complex piping systems, it is always advisable to seek the help of a professional plumber. Always turn off the water or gas supply before modifying any piping system, and perform regular maintenance to keep your pipes in great condition.
Abhishek is a seasoned blogger and industry expert, sharing his insights and knowledge on various topics. With his research, Abhishek offers valuable insights and tips for professionals and enthusiasts. Follow him for expert advice on the latest trends and developments in the metal industry.