Soldering is an essential skill for any electrical project. But, you must ensure you’re doing it right when it comes to soldering nickel strips. After all, you don’t want to end up with a faulty connection or, worse, a dangerous one. This blog post will look at the basics of soldering nickel strips and provide tips and tricks for achieving good results.
Gather Your Supplies
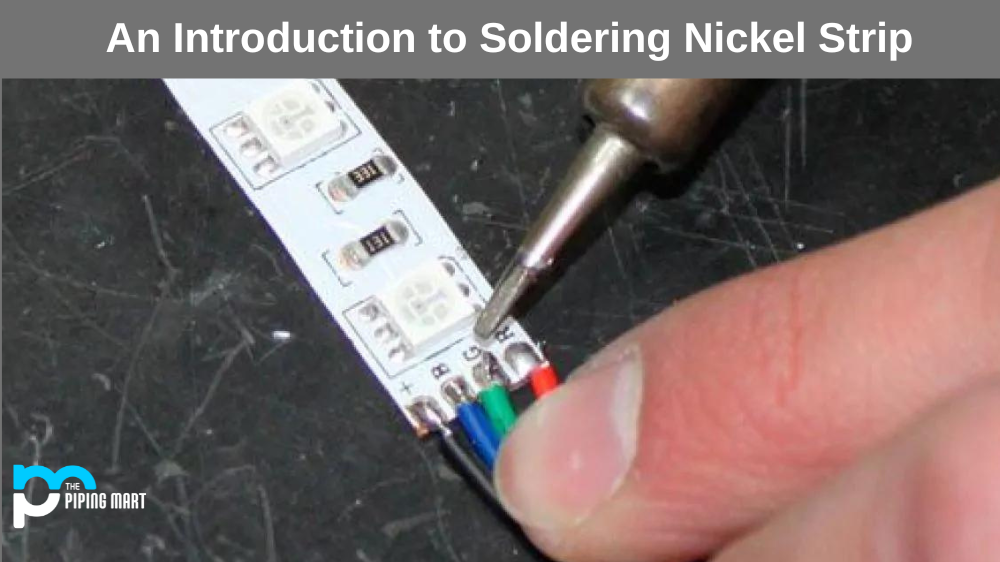
The first step in soldering nickel strips is ensuring you have the right supplies. You will need a soldering iron (preferably one with adjustable heat settings), flux-core solder, rosin-core solder, and the nickel strip itself. The size of the nickel strip will depend on your project but typically ranges from 0.2mm to 1mm thick. It’s also important to ensure that the nickel strip is clean before you begin soldering, as any dirt or grease can interfere with the process.
Heat Your Iron
Once you have all your supplies ready, it’s time to fire up your soldering iron. When choosing a temperature setting for your iron, it is important to remember that higher temperatures are not necessarily better when working with nickel strips. Too much heat can cause damage to the material, so it is best to start at a lower temperature and work your way up if necessary. A good starting point would be between 350°F and 400°F (177°C – 204°C).
Apply Flux Core Solder
Now that your iron is hot enough, it’s time to apply solder to the joint between two pieces of nickel strip that you want to connect. Begin by applying flux core solder along each side of the joint, then use your soldering iron tip to melt the solder into place until it forms an even layer across both pieces of metal. This will help ensure a secure connection between them once they are heated together in the next step.
Add Rosin Core Solder
After applying flux core solder along both sides of the joint, you can add rosin core solder on top of this layer using your soldering iron tip once again until it forms an even layer across both pieces of metal. The rosin core solder helps form an airtight seal around the connection, strengthening its reliability when under load or vibration conditions such as those found in electrical projects like batteries or motor controllers for drones and robots. Be sure to keep this connection the same since too much heat can cause damage, just like with the flux core solder application described earlier!
Conclusion:
Soldering nickel strips may seem intimidating at first, but it can be quite simple once you get familiar with its basic concepts! With these steps as a guide, plus some practice and patience, you should be able to confidently create reliable connections between two pieces of metal in no time! Remember not to overheat parts during assembly and use proper ventilation when necessary – safety always comes first! With these tips in mind, go forth and create something awesome!
Meet Bhavesh, a seasoned blogger with a wealth of knowledge and experience. From metal products manufacturing to retail, Bhavesh has a diverse background in various industries and is dedicated to sharing his insights and expertise with readers.