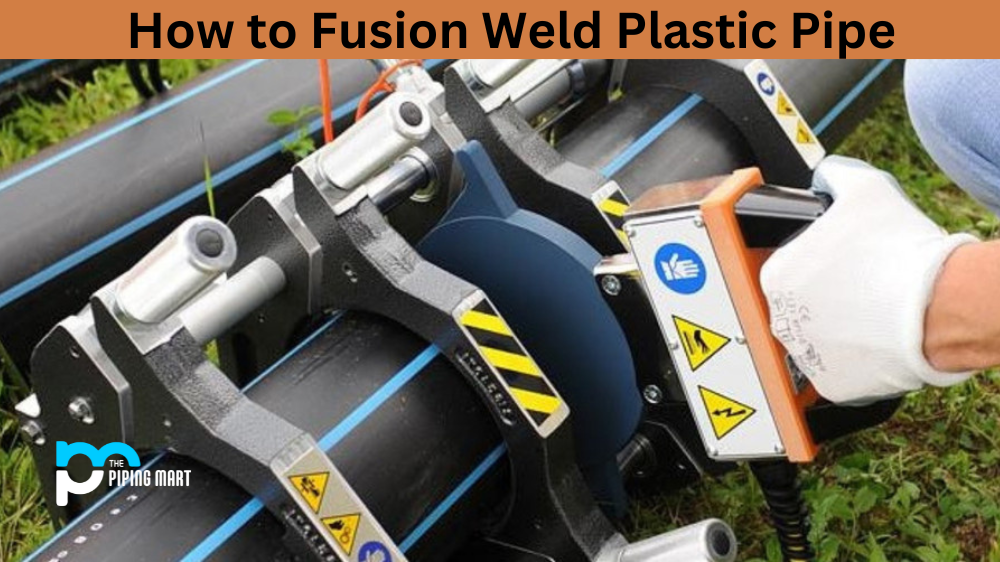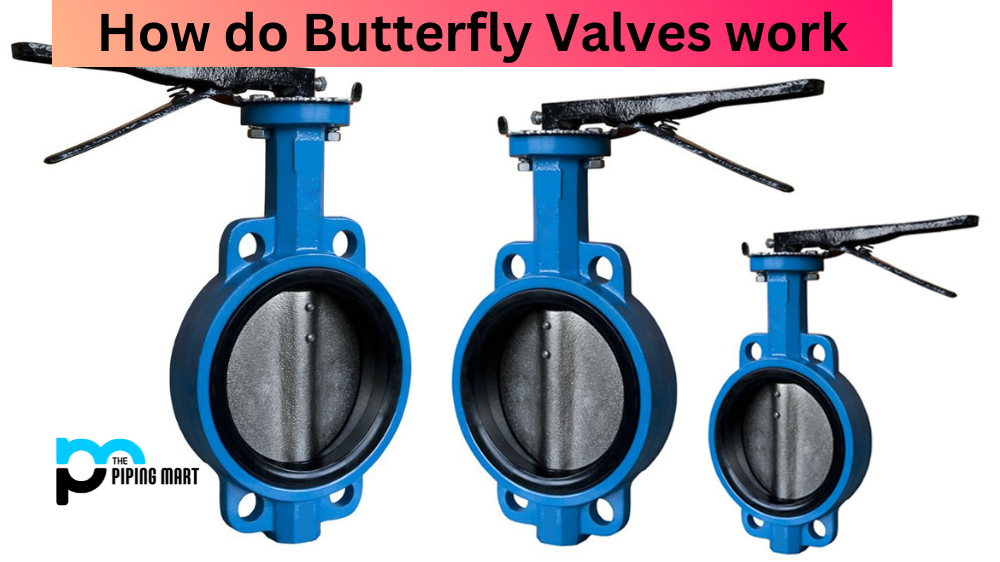
Installing a butterfly valve is an important part of many plumbing and HVAC systems. Although it can seem intimidating, with the right tools and proper steps, anyone can install a butterfly valve into their system. This guide will explain each step in detail so you can have your system up and running quickly and safely.
Step 1: Prepare Your Materials
Before beginning any installation, make sure that you have all the materials needed for the job. This includes the butterfly valve itself, along with any accompanying hardware such as nuts, bolts, or washers. Additionally, you will need a wrench set suitable for the size of nuts and bolts used in your system. It is also recommended to have some thread sealant on hand in case of leaks.
Step 2: Measure the Pipe Fittings
Once all of your materials are ready, you will need to measure the pipe fittings where you plan to install the butterfly valve. This step is important since it ensures that your valve will fit properly and securely into place without any issues. Take note of these measurements, as they will be necessary when selecting your butterfly valve size later on.
Step 3: Select an Appropriate Butterfly Valve Size
Once you have measured your pipe fittings, you can select an appropriate butterfly valve size that fits within those measurements. It is best to select one that is slightly smaller than the pipe fitting measurements so that it will fit securely within them without any wiggle room for potential leaking or other issues. Once you have selected a size, double-check to make sure it matches up with your measurements from Step 2 before proceeding with the installation.
Step 4: Install Your Butterfly Valve.
Now that you have selected an appropriate butterfly valve size for your system, it’s time to begin installing it! Start by placing the main body of the valve into position at its designated location within your piping system; make sure that it is centred and secure before proceeding further with the installation. Next, attach all accompanying hardware (such as nuts and bolts) according to instructions until everything feels snugly secured in place—if necessary, use thread sealant around each joint for extra security against leaks! Finally, test out your new butterfly valve by turning on water pressure or air pressure through it; if everything holds up, then congratulations—your installation was successful!
Conclusion:
Installing a butterfly valve may seem intimidating at first glance, but with a few simple steps, anyone can do it! By following this guide closely and taking accurate measurements prior to purchasing any components, you should be able to quickly get everything installed correctly without any major issues—just remember, always use extra caution when dealing with plumbing or HVAC systems!
Pipingmart is a B2B portal that specializes in metal, industrial and piping items. Additionally, we share the latest information and information about materials, products and various types of grades to assist businesses that are involved in this business.